How To Fix A Skipped Stitch On A Brother Lx3817 Sewing Machine
Skipped stitches are one of the most common frustrations for anyone who uses a Brother LX3817. Whether you’re working on a simple quilt or a detailed garment, a clean, even stitch line is essential for both appearance and durability. This guide walks you through the most effective troubleshooting steps, maintenance tips, and when to call in professional help.
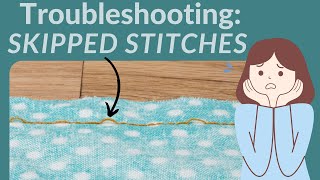
Identify the Symptoms
Before you begin any repairs, confirm that the machine is actually skipping stitches rather than simply producing uneven tension. Look for the following signs:
- Regular gaps of one or more stitches in a straight line.
- Thread breaking or fraying at the point of the gap.
- Unusual noise from the bobbin area while the needle moves.
If you notice any of these symptoms, proceed with the troubleshooting steps below.
Common Causes of Skipped Stitches
Understanding why stitches are skipped helps you target the right fix. The most frequent culprits on the Brother LX3817 include:
- Poorly threaded machine – incorrect upper or bobbin threading can cause the needle to miss the thread.
- Dull or damaged needle – a bent or blunt needle will not penetrate the fabric cleanly.
- Improper bobbin placement – a bobbin that is twisted or sits too high/low disrupts the stitch formation.
- Incorrect stitch settings – using a stitch length that is too long for the fabric type.
- Dirty or worn feed dogs – these drive the fabric forward; if they slip, the needle can miss the previous stitch.
Step‑by‑Step Fix for Skipped Stitches
1. Re‑Thread the Machine
- Turn off the machine and raise the needle to its highest position.
- Raise the presser foot and open the upper thread guide.
- Pull the thread completely out of the tension discs.
- Thread the upper path again, ensuring the thread passes through the thread guide, tension discs, and take‑up lever correctly.
- Insert a fresh bobbin, making sure it spins clockwise when viewed from the front.
- Pull both top and bobbin threads through the needle plate and gently tug to remove slack.
2. Replace the Needle
Even a new needle can be defective, so always start with a fresh, appropriate size for your fabric (generally 70/10 for medium‑weight projects).
- Raise the needle to its highest position.
- Turn the handwheel toward you to release the needle clamp.
- Remove the old needle and insert the new one with the flat side