How To Make A Resin Keychain Without Bubbles Using A Lighter
Creating a clear resin keychain is a popular craft that lets you preserve tiny treasures, embed colors, or simply enjoy a glossy accessory. One of the most common challenges is eliminating air bubbles that can appear during mixing and pouring. This guide explains a reliable, low‑cost technique that uses a handheld lighter to remove bubbles and achieve a smooth finish.
Materials You’ll Need
- Two‑part epoxy resin (clear, UV‑resistant for outdoor durability)
- Silicone keychain molds – choose a shape that fits your design.
- Mixing cup and stir stick – preferably disposable to avoid contamination.
- Protective gloves and eyewear – resin can irritate skin and eyes.
- Isopropyl alcohol (70% or higher) – for cleaning surfaces.
- Hair dryer (optional) – for pre‑heating the work area.
- Butane lighter – a standard cigarette lighter works well.
- Small decorative elements (glitter, dried flowers, tiny charms) – optional.
Preparing Your Workspace
Start by setting up a well‑ventilated area. A kitchen counter, garage table, or outdoor bench works, as long as you can keep dust away from the resin. Wipe the surface with a light‑alcohol damp cloth and let it dry completely. Lay a sheet of parchment paper or a silicone mat under the mold to catch any accidental drips.
Step‑by‑Step: Mixing and Pouring
- Measure the resin and hardener. Follow the manufacturer’s ratio—most clear epoxies use a 1:1 volume mix. Use a graduated cup for accuracy.
- Stir slowly and thoroughly. Combine the two parts with a stir stick, scraping the sides and bottom of the cup. Stir for 2‑3 minutes; rapid mixing can introduce additional bubbles.
- Add decorative items. If you want glitter or a tiny charm inside the keychain, place it in the mold now. This prevents the items from floating to the surface during curing.
- Pour the resin. Slowly tilt the cup and let the resin flow into the mold. A gentle, continuous stream reduces the chance of trapped air.
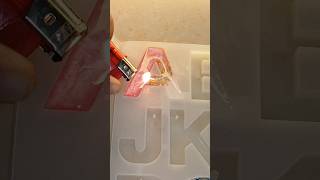
Using a Lighter to Remove Bubbles
The lighter technique works because the flame quickly heats the resin’s surface, causing bubbles to rise and pop without disturbing the mixture. Follow these precise steps for the best results:
- Light the lighter. Ignite the flame and hold it at a comfortable distance—about 2‑3